How to Stream on Twitch: Everything You Need to Know
Start streaming on Twitch in no time using your favorite gaming platform.
Dec 13, 2022 | Share ![]()
![]()
![]()
Gaming, How-To, Streaming Guides
Broadcasting your gameplay to Twitch isn’t overly difficult, but there are a lot of steps to getting your livestream up and running. Got a Nintendo Switch? You can stream from it too using a computer and an affordable USB adapter. This guide will show you how to stream on Twitch even if you just want to share your fun gaming experiences with a few friends.
How to stream on Twitch
The following instructions assume you already have a Twitch account and you’re ready to broadcast from your favorite gaming platform. If you don’t already have an account, sign up on the Twitch website.
Before you begin, be sure that you have the best internet connection possible for livestreaming on Twitch. Verizon Fios is the best internet for gaming based on proprietary data gathered from our speed test. It’s a fiber-to-the-home internet service with the lowest latency and the fast upload speeds you need to best broadcast your gameplay.
Enter your zip code below to find the best plans in your area.
Windows/macOS/Linux
These instructions will show you how to broadcast on Twitch using Open Broadcaster Software (OBS) Studio for Windows, macOS, and Linux. The software is free and easy to use.
AMD and NVIDIA have basic GPU-native tools too
While this section focuses on OBS Studio, you can use NVIDIA’s GeForce Experience desktop client on PCs with a GTX or RTX GPU, which provides an overlay that includes a broadcast component. On PCs with a Radeon GPU, you can use the Record & Stream component in AMD’s Radeon Software. However, we chose to use OBS Studio because it offers a higher level of customization, broadcasts to more locations, and is a popular multiplatform client.
Part 1—Connect OBS Studio to Twitch

Step 1: With OBS Studio open, click on Settings, displayed in the bottom right corner. Alternatively, click on File followed by Settings in the drop-down menu.
Step 2: The Settings panel appears. Select Stream on the left.
Step 3: On the right, select Twitch as your service (if it’s not set already).
Step 4: Click on the Connect Account button.
Step 5: Enter your Twitch login credentials.
Don’t want to log in?
Enter your stream key instead. You can find this key through the Twitch dashboard via Profile > Settings > Channel and Videos.
Step 6: Click on the Apply button to finish.
Part 2—Configure OBS Studio

Step 1: With OBS Studio open, click on Settings, displayed in the bottom right corner. Alternatively, click on File followed by Settings in the drop-down menu.
Step 2: Select Video listed on the left.
Pro tip:
Your Base (Canvas) Resolution is what you’ll see on your computer. Your Output (Scaled) Resolution is what viewers will see.
Step 3: Set your Base and Output resolutions and then click Apply.

Step 4: Select Output listed on the left.
Step 5: Under Streaming, select a Video Bitrate. Here’s a quick guide:
- 1080p @ 60 fps = 6,000 Kbps
- 1080p @ 30 fps = 5,000 Kbps
- 720p @ 60 fps = 5,000 Kbps
- 720p @ 30 fps = 3,500 Kbps
Step 6: Select an encoder: NVENC (NVIDIA), QSV (AMD or Intel), or x264 (software).

Step 7: On the left, select Audio.
Step 8: Under Global Audio Devices, select the correct source for Desktop Audio (your game).
Step 9: Select the correct source for Mic/Auxiliary Audio (your microphone) and then click Apply.
Part 3—Create your scene

Step 1: Under Scenes located in the bottom left corner, click the Plus icon.
Step 2: Enter a name and click OK.
Step 3: Under Sources, click the Plus icon.
Step 4: Select Game Capture on the pop-up menu.
Step 5: Enter a name and click OK.
Step 6: The Properties panel opens. Select a Mode (Fullscreen, Specific Window, or Foreground Window) and enable any other element you want in the session. For instance, the Capture third-party overlays setting adds the Steam overlay to your broadcast. Click OK when you’re ready.
Step 7: Under Sources, click the Plus icon.
Step 8: Select Video Capture Device on the pop-up menu.
Step 9: Enter a name for your webcam and click OK.
Step 10: The Properties panel opens. Select the correct device, change other settings as necessary, and then click OK.
Part 4—Add Twitch chat

Step 1: Log in to Twitch in a browser and click on your profile icon.
Step 2: Select Channel on the drop-down menu.
Step 3: Select Chat.
Step 4: Click the Cog icon in the bottom right corner.
Step 5: Select Popout Chat on the pop-up menu.
Step 6: Copy the URL.
Step 7: In OBS Studio, click View.
Step 8: Select Docks and then Custom Browser Docks.
Step 9: Enter a name, paste the URL, and then click Apply.
Part 5—Start your stream
Step 1: Start your game.
Step 2: In OBS Studio, click the Start Streaming button.
Step 3: To end the session, click the Stop Streaming button and end your game.
Xbox One and newer
Now that Microsoft has discontinued Mixer and removed the integrated tools for broadcasting, you need the Twitch app to broadcast your gameplay.
Getting started is a two-part process. First, you need to verify a few settings on the Xbox. After that, you can download and log in to the Twitch app, adjust your session settings, and then start your broadcast.
Part 1—Get your console ready

Here we need to make changes in the system settings before you install the Twitch app.
Step 1: Press the Xbox button on your controller and select Settings.
Step 2: Select Account.
Step 3: Select Privacy & Online Safety.
Step 4: Select Xbox Privacy.
Step 5: Select View Details & Customize.
Step 6: Select Game Content.

Step 7: Under Broadcast Gameplay, verify that the setting reads Allow.
Step 8: Under “You can share content made using a connected camera,” verify that the setting reads Allow.
Step 9: Press the B button to go back to the previous screen and select Online Status & History.
Step 10: Under “Others can see if you’re online,” verify that the setting reads Everybody.
Part 2—Set up Twitch
Step 1: Install the Twitch app from the Microsoft Store.
Step 2: Log in to your Twitch account.
Step 3: Go to twitch.tv/activate on a computer and enter the six-digit code you see on the screen.
Step 4: In the Twitch app, select the Broadcast tab.
Step 5: Choose your video options.
Step 6: Set a title for your broadcast.
Step 7: Add your camera and microphone.
Part 3—Start and stop your session
Step 1: In the Twitch app, select Start Streaming.
Step 2: Press the Xbox button to launch the game you want to broadcast.
Step 3: Press the Xbox button to reopen Twitch and select Stop Streaming to end the broadcast.
PlayStation 4 and newer
Sony’s method doesn’t require an app. Instead, you just need to connect the PlayStation console to your Twitch account and you’re good to go.
Part 1—Get your console ready

Step 1: Select the Settings icon.
Step 2: Scroll down and select System.
Step 3: Clear the box next to Enable HDCP.
Step 4: Go back to the main Settings screen and select Account Management.
Step 5: Select Link with Other Services.
Step 6: Select Twitch.
Step 7: Go to twitch.tv/activate and enter the six-digit code you see on the screen.
You can’t use just any camera.
You can use only the PlayStation Camera with the PS4 and the PlayStation HD Camera with the PS5. No other cameras are compatible.
Part 2—Start your broadcast

Step 1: Start the game you want to broadcast.
Step 2: Press the Share button on your controller.
Step 3: Select Broadcast Gameplay.
Step 4: The Broadcast Gameplay panel appears on your screen. Check the box next to each setting to enable or disable the following:
- Include video from PlayStation Camera in Broadcast
- Include Microphone Audio in Broadcast
- Display Message to Spectators and Spectators’ Comments
Step 5: Enter a title for your broadcast.
Step 6: Select the output quality.
Step 7: Select Start Broadcasting to begin.
Step 8: Press Share, select Broadcast Settings, and then select Stop Broadcasting to end the session.
Nintendo Switch (original and OLED)
So, this is a pain. Nintendo doesn’t provide a native tool and there’s no Switch-specific Twitch app. Instead, you need a capture card connected to a computer and extra software to send your stream to Twitch.
Here we will use Avermedia’s Live Gamer Portable 2 Plus because it’s affordable, connects via USB, and supports 4K displays. We will also use the included RECentral software for Windows—the instructions for RECentral Express on macOS may be different.
Warning:
This method does not work with the Nintendo Switch Lite because the console does not have the required Pericom matrix switch to send video through the USB-C port.
Part 1—Connect the adapter
Step 1: Connect the Nintendo Switch dock’s HDMI cable to the adapter’s input port.
Step 2: Connect an external display to the adapter’s output port if needed—this is a pass-through port so you can see your Nintendo Switch gameplay.
Step 3: Connect the adapter to a USB-A port on your computer.
Pro tip:
The desktop software has a preview window showing your gameplay, but you’ll want to keep the software minimized during the broadcast to reduce stress on your computer’s CPU. Connect an external display instead, as instructed in Step 2.
Part 2—Set up Twitch

Step 1: On your computer, open the RECentral software.
Step 2: Select Capture/Stream on the Function Dial displayed in the top left corner.
Step 3: Under Capture Mode, select Single if you’re not adding a webcam feed, or choose Multi to add your live mugshot.
Step 4: Under Capture Device, select Live Gamer Portable 2.
Step 5: Click the Stream tab displayed under the preview window.
Step 6: Under Streaming Platform, click on the Plus icon.
Step 7: Select Twitch.
Step 8: Log in to your Twitch account.
Step 9: Under Server, select a server or leave this setting as Automatic.
Step 10: Under Quality, select one of three presets: Optimal, Good, and Normal.
Pro tip:
You can edit these three presets or create a new profile by clicking on the Plus icon. Settings you can modify include resolution, video bitrate, refresh rate, H.264 profile, and keyframe.
Step 11: Under Codec, select one of three options: NVIDIA, QSV (Intel or AMD), or H.264. As shown above, this option may not be available, so skip to the next step.
Which codec should you use?
A codec compresses and decompresses video so the data doesn’t clog the internet highways like a hairball in a drain. If your computer has an NVIDIA or AMD graphics chip, select their codec first. However, a codec option may not even be available, as recent builds of RECentral 4 automatically select the appropriate codec and don’t present additional options.
Step 12: Check the box next to Enable Streaming Backup if you want to use this feature. This records and saves your stream. If you enable this feature, choose a quality: Same as Recording or Same as Streaming.
Step 13: Set the Audio (Nintendo Switch) and External Audio (headphones) levels and adjust the Play/Record volume.
Part 3—Start and stop your broadcast
Step 1: Click the Stream button in the bottom right corner to begin.
Step 2: Click the Stream button again to stop.
Android 11 and newer

The following steps assume that you already installed the Twitch app and logged in to your account. Several steps are necessary only when setting up your first stream.
Step 1: Open the Twitch app and tap the Camera icon located in the top right corner.
Step 2: Tap Stream Games on the following screen.
Step 3: Tap the Enable Microphone button to grant Twitch access.
Step 4: Tap the Enable Overlays button followed by Open Settings.
Step 5: Select Twitch on the list and then tap the toggle next to Allow Display Over Other Apps to enable this feature.
Step 6: Tap the Back Arrow at the top to return to Twitch.
Step 7: Select a category and then tap Next.
Don’t see the game you want to broadcast?
Tap the game’s name into the search field and then tap on a result. For instance, you will need to search for Minecraft.
Step 8: Enter a title for your stream, add tags, select your stream language, and modify the “go live” notification if needed.
Step 9: Tap Launch Game. Your game should automatically load with the Twitch stream manager overlay.

Step 10: Tap the Livestream to begin, and then tap the X to minimize the stream manager.
Step 11: To stop the broadcast, tap on the Livestream button and then tap the End Stream button.
iOS 14+ and iPadOS 14+

Step 1: Open the Twitch app and tap the Camera icon located in the top right corner.
Step 2: Tap Stream Games on the following screen.
Step 3: Tap on a category and then tap Next.
Don’t see the game you want to broadcast?
Tap the game’s name into the search field and then tap on a result. For instance, you will need to search for Minecraft.
Step 4: Grant access to your microphone (upon first use).
Step 5: Enter a title for your stream, and then adjust the Microphone and Device (game) volume.
Step 6: Tap the purple Record button to begin your broadcast.
Step 7: Switch to the game you want to broadcast.
Step 8: Return to the Twitch app to end the broadcast.
What you need for the best Twitch stream
Good hardware (computer only)
When you play a game, your graphics chip handles all the heavy rendering load while the processor deals with everything else. If you broadcast your gameplay, your computer must copy all of that hard work and toss it across the internet as you play.
Ideally, you want the remote viewing resolution to be 1080p, or 1920 x 1080, with a rate of 60 frames per second. To hit this target, you will need hardware that can handle the output while locally maintaining a decent frame rate and quality level on your end.
Processor: AMD Ryzen or Intel Core
While the graphics chip does all the heavy rendering, the processor handles everything else in and outside your game. AMD’s Ryzen 5000 Series CPUs provide more cores for your dollar while Intel’s “Comet Lake” and “Rocket Lake” chips pack a lot of performance per core.
Here are a few suggestions:
| Best overall | Best for gaming | Best high-end option | Best for max performance | |
|---|---|---|---|---|
| AMD | Ryzen 5 5600X | Ryzen 9 5900X | Ryzen 9 5950X | Ryzen Threadripper 3990X |
| Intel | Core i5-11600K | Core i5-11600K | Core i7-10700K | Core i9-10980XE |
* Amazon.com prices (as of 1/3/2022 6:36 MST). Read full disclaimer.
Graphics: NVIDIA GTX / RTX or AMD Radeon
NVIDIA’s GTX 10 Series is old but they still work well. If you already have a GTX 10 Series card, be wary of how in-game settings affect your target broadcast resolution and framerate. Consider upgrading to the newer RTX 20 and RTX 30 series for a better broadcast.
On the AMD front, you can’t go wrong with the Radeon RX 5000 and RX 6000 Series cards.
Memory and storage
Generally, all you need is 8 GB for gaming when you’re not broadcasting. Having 16 GB of system memory, however, gives your computer room to breathe if needed. But 32 GB or more is overkill.
On the storage front, an M.2 PCIe NVMe SSD provides your fastest read and write speeds. Both the CPU and GPU pull data from your local storage, so you want an extremely fast drive. A SATA-based SSD is your next step down while hard drives are the slowest.
Desktop software (computer only)
To capture your gameplay on a computer (or the Nintendo Switch), you need desktop software. We used OBS Studio as an example, but there are others you may like better. AMD and NVIDIA also provide native tools, but they work in Microsoft Windows only.
Note that we list Twitch Studio Beta on the chart below. While this software takes the pain out of setting up your broadcast, it’s only for Microsoft Windows at this time.
| Software | Cost | Features | Get it |
|---|---|---|---|
| OBS Studio | Free | View Software | |
| OneStream | Free–$99.00/mo. | View Software | |
| Streamlabs OBS | Free | View Software | |
| Twitch Studio Beta | Free | View Software | |
| Wirecast | $599.00 (starting) | View Software | |
| XSplit Broadcaster | $15.00/mo. to $200.00/lifetime | View Software |
A webcam and a microphone
If you have no plans to engage with your audience, then a webcam and a microphone aren’t necessary. If you want to talk trash and display your happy gaming face, you can’t go wrong with products sold by Razer and Logitech.
Here are a few examples:
| Webcams | Image | Price | Style | Get it |
|---|---|---|---|---|
| Logitech C920s Pro HD |  | $59.99 | Clamp-on | View on Amazon |
| Logitech C922x Pro |  | $94.63 | Clamp-on | View on Amazon |
| Razer Kiyo |  | $79.99 | Clamp-on | View on Amazon |
| Razer Kiyo Pro |  | $129.99 | Clamp-on | View on Amazon |
* Amazon.com prices (as of 1/3/2022 6:36 MST). Read full disclaimer.
| Microphones | Image | Price | Style | Get it |
|---|---|---|---|---|
| Blue Yeti X | 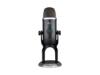 | $139.00 | Upright | View on Amazon |
| Blue Yeticaster | 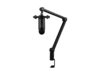 | $189.05 | Hanging | View on Amazon |
| Razer Seiren Mini | 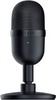 | $49.99 | Upright | View on Amazon |
| Razer Seiren Elite | $305.97 | Upright | View on Amazon |
* Amazon.com prices (as of 1/3/2022 6:36 MST). Read full disclaimer.
A good router
Whether you broadcast wirelessly or not, you need a good router to handle your gaming traffic along with every other connected device. If it’s overloaded or simply worn out due to age, it will bottleneck your connection and reduce your broadcast quality.
If you’re broadcasting from a computer or game console, use Ethernet for the best connection. If you absolutely must broadcast over Wi-Fi, use the 5 GHz band.
Alternatively, you can plug straight into a modem and bypass the router altogether—just be sure your computer’s firewall is running and your antivirus is up to date. Keep your wired device connected as usual if you have a modem/router combo.
If you need a router upgrade, here are a few suggestions:
- Best Wi-Fi router for gaming: ASUS ROG Rapture GT-AX11000
- Best long-range router: ASUS RT-AC88U
- Best mesh networking router: Google Nest Wi-Fi
- Best Wi-Fi router for streaming: Linksys EA7500
- Best Ethernet cable: Vandesail CAT 7
A good internet connection
You need an internet connection with a good upload speed for Twitch broadcasting, not a good download speed. You’re essentially sending (uploading) your streaming bits to Twitch, and you need enough bandwidth to accommodate your broadcast along with every other connected device.
The problem is digital subscriber line (DSL) and cable internet services have far lower upload speeds than their download speeds. Fiber is the only exception, which provides equal upload and download speeds, but its availability isn’t as widespread as DSL and cable internet.
That said, you should consider fiber internet given its upload speeds, low latency, and reliability.
Enter your zip code below to discover the best plans—including fiber internet—in your area.
| Resolution | Frame rate | Bitrate | Preset | Keyframe | Upload speed |
|---|---|---|---|---|---|
| 1920 x 1080 | 60 fps | 6,000 | 2 seconds | 8–10 Mbps | |
| 1920 x 1080 | 30 fps | 4,500–5,000 | 2 seconds | 4.5 Mbps | |
| 1280 x 720 | 60 fps | 4,500–5,000 | 2 seconds | 6 Mbps | |
| 1280 x 720 | 30 fps | 3,000–3,500 | 2 seconds | 4 Mbps |
| Resolution | 1920 x 1080 |
| Frame rate | 60 fps |
| Bitrate | 6,000 |
| Preset | |
| Keyframe | 2 seconds |
| Upload speed | 8–10 Mbps |
| Resolution | 1920 x 1080 |
| Frame rate | 30 fps |
| Bitrate | 4,500–5,000 |
| Preset | |
| Keyframe | 2 seconds |
| Upload speed | 4.5 Mbps |
| Resolution | 1280 x 720 |
| Frame rate | 60 fps |
| Bitrate | 4,500–5,000 |
| Preset | |
| Keyframe | 2 seconds |
| Upload speed | 6 Mbps |
| Resolution | 1280 x 720 |
| Frame rate | 30 fps |
| Bitrate | 3,000–3,500 |
| Preset | |
| Keyframe | 2 seconds |
| Upload speed | 4 Mbps |
Keep in mind that your internet plan may bottleneck your broadcast. For instance, Spectrum’s highest tier (gig Internet) maxes out at 35 Mbps in terms of upload speed. Ultra Internet has an upload speed of up to 20 Mbps, and its Standard Internet plan maxes out at 10 Mbps.
Additionally, you want to use just 75% of your internet plan’s total upload bandwidth so other devices don’t interrupt your stream. That means if your plan supports 10 Mbps uploads, and your upload allotment is 7.5 Mbps, then your stream is limited to 1080p at 30 fps.
If you don’t know your upload and download speeds, use our internet speed test tool.
Tips for gaining a Twitch audience
If you want to attract a wide audience, you need a reason for viewers to stay on your channel and keep coming back.
Entertain
You need to be fun and engaging to entertain fellow gamers. Viewers are your peers, so it’s okay to talk to them as such so long as you’re not offensive. Do your best to rise above any negativity and entertain the audience that appreciates your hard work.
Stick to a schedule
You know exactly when your favorite shows air on TV. Your audience has the same expectations. Try to be consistent so viewers know when you’ll be back online to showcase another game in your special way.
Choose your game wisely
This is debatable. Plenty of game broadcasters like Ohmwrecker play what they want and gain a huge following just by being entertaining. You could play the worst game of all time but gain millions of viewers just by going nuts over the atrocious gameplay. Pewdiepie playing Flappy Bird is a perfect example.
That said, if you want to gain a huge foothold in the battle royale streaming market, broadcasting Stardew Valley gameplay won’t land you coveted Fortnite viewers.
FAQ about Twitch streaming
What is Twitch?
Twitch is a livestreaming platform launched in June 2011. Now owned by Amazon, the service has 2.78 million concurrent viewers (average), 105,000 concurrent channels (average), and 8.46 million monthly broadcasters. In 2021, viewers consumed 1,460 billion minutes.1
With Twitch, you can do the following:
- Broadcast anything legal—even content not specific to gaming, although the audience is mostly gamers
- Interact with viewers
- Upload recorded video
- Make money through the Twitch Partner Program
How is Twitch different from YouTube?
Twitch focuses on livestreaming and generally feeds a gaming audience. YouTube is more of a content service for watching prerecorded videos on various themes, like music, how-to videos, and so on. YouTube does offer a livestreaming service—fittingly called YouTube Live—that is similar to Twitch, though it doesn’t enjoy the same popularity among streamers that Twitch does.
How much does Twitch cost?
Twitch is free for broadcasters and viewers alike. The company earns its revenue through advertisements.
Twitch Turbo costs $8.99 per month. This plan extends the save time for all past broadcasts from 14 days to 60 days. This plan is ideal if you want ad-free viewing, an expanded emote set, extended broadcast storage, and more.
Is Twitch safe for kids?
No, Twitch is not safe for kids. Children under the age of 13 cannot have a Twitch account, but they can watch all Twitch content for free. That means they can view broadcasts containing violence and mature content.
Broadcasts happen in real time, so your child may be exposed to adult content. Although Twitch began cracking down on hateful and inappropriate conduct in 2018, there’s always a risk.3
The platform’s Privacy Notice requests that children under 13 are not to “use or access the Twitch services at any time or in any manner.” Parents who discover that their child has a Twitch account can have it terminated by sending a request to [email protected].2
Which games can I stream on Twitch?
You can broadcast your gameplay from any game unless it falls into one of these categories:
- The game has an “Adults Only” ESRB rating
- The game violates the Twitch Community Guidelines
Twitch currently lists more than 30 games you cannot broadcast, so be sure to check that the game you want to stream isn’t on there.
Sources
1. Twitchtracker, “Twitch Statistics & Charts,” Accessed January 3, 2022.
2. Twitch, “Privacy Notice,” Accessed June 1, 2021.
3. Twitch, “Twitch Community Guidelines Updates,” February 8, 2018. Accessed June 1, 2021.
Disclaimer
Product prices and availability are accurate as of the date/time indicated and are subject to change. Any price and availability information displayed on Amazon.com at the time of purchase will apply to the purchase of this product. HighSpeedInternet.com utilizes paid Amazon links.
CERTAIN CONTENT THAT APPEARS ON THIS SITE COMES FROM AMAZON. THIS CONTENT IS PROVIDED ‘AS IS’ AND IS SUBJECT TO CHANGE OR REMOVAL AT ANY TIME.
Author - Kevin Parrish
Kevin Parrish has more than a decade of experience working as a writer, editor, and product tester. He began writing about computer hardware and soon branched out to other devices and services such as networking equipment, phones and tablets, game consoles, and other internet-connected devices. His work has appeared in Tom’s Hardware, Tom's Guide, Maximum PC, Digital Trends, Android Authority, How-To Geek, Lifewire, and others. At HighSpeedInternet.com, he focuses on network equipment testing and review.
Editor - Cara Haynes
Cara Haynes has been editing and writing in the digital space for seven years, and she's edited all things internet for HighSpeedInternet.com for five years. She graduated with a BA in English and a minor in editing from Brigham Young University. When she's not editing, she makes tech accessible through her freelance writing for brands like Pluralsight. She believes no one should feel lost in internet land and that a good internet connection significantly extends your life span.
Related Posts