Spectrum offers two options for installing internet service: a self-install and a professional install. We go through the pros and cons of each installation method to help you decide which best suits your needs. We also provide detailed instructions for completing a self-install and getting ready for a professional install.
The first order of business is deciding whether to opt for the self-install or schedule a pro install. The self-install is cheaper, but it doesn’t always work. If you can’t afford to wait for a tech visit in the event your self-install fails, it’s best to schedule a professional installation from the start. Let’s take a look at the pros and cons of each option.
Looking to sign up for Spectrum service? Enter your zip code to see the best internet plans in your area.
Pro installation vs. self-installation
Pro install
 Pros:
Pros:
- Tech performs entire installation (less work for you)
- Tech can fix any issues that arise
- Tech can move the connection to a different room
- Tech checks overall network health and uncovers potential problems
 Cons:
Cons:
- Installation fee ($65)
- Required scheduled appointment
- Larger time commitment (usually 2–4 hours)
Self-install
Pros:
- No appointment necessary
- Cheap price ($30 activation fee)
- Quick and easy setup
Cons:
- Doesn’t always work
- Can’t move the connection to a different room
- May leave some issues with your network unchecked
Self-install Spectrum Internet®
Cost: $30 self-install activation fee
What you need: Spectrum self-install kit, compatible modem or gateway
How long it takes: 30 min (approx.)
Will a Spectrum self-install work for me?
A self-install is the quickest way to install Spectrum Internet,® but you have to do it yourself. The good news is it’s very easy. To do it, you need a self-install kit, and your residence must be connected to the Spectrum network.
How to tell if your home is connected to the Spectrum network:
- Ask SpectrumSpectrum can tell you how long it’s been since the residence has had its services. If the address has had service recently (within 12 months), it’s more likely a self-install will work. If the address hasn’t had Spectrum services in a while, it doesn’t mean the self-install won’t work, it’s just less likely.
- Ask the prior residentsIf the prior residents can confirm they had Spectrum Internet, the lines are probably still active and working. You should also ask the prior residence where the modem was installed, if possible.
Self-install is a good option if:
- The residence has recently had Spectrum services (especially apartments).
- You’re comfortable setting up your equipment.
- You can afford to wait for a pro install appointment in the event the self-install doesn’t work.
Wired for cable vs. connected to the Spectrum network
Being connected to the network isn’t the same thing as being wired for cable. If a home is wired for cable, that just means coaxial cable outlets are installed, but it doesn’t mean those outlets are already connected to the Spectrum ISP network.
You need a tech from Spectrum to actually connect the home to the network. In a way, when you opt for a self-install, you’re sort of betting that the home has been connected to the Spectrum network in the past and that the connection is still active. Learning how recently the home has had Spectrum services—either by contacting Spectrum or the prior residents—can tell you how likely it is that a self-installation will work.
How long does a Spectrum self-install take?
You can complete your self-install in about 30 minutes, and a good chunk of that time is waiting while the modem boots, updates, and then reboots. The actual equipment setup is very simple and takes only a minute or two.
Professional installation for Spectrum Internet®
Cost: Up to $65
What you need: A person 18 or older present
How long it takes: 1–3 hours
With a professional install, a Spectrum technician comes to your residence and sets up your new internet service for you. The biggest advantage a pro install has over a self-install is that the tech can connect your residence to the Spectrum network.
The benefits don’t stop there, though; the tech can also place the modem in a room of your choice and find and repair any issues with your home’s cabling.
A professional installation is a good option if:
- Your residence hasn’t had Spectrum service for over 12 months.
- The coaxial cables and outlets look old or damaged.
- You’re installing multiple pieces of equipment (such as an internet gateway and 4 TV boxes).
- You want to install your Spectrum modem or gateway in a room that doesn’t have an active coaxial cable. See our guide on where to place your router to learn more about picking the best spot in your home.
How to self-install Spectrum Internet®
To self-install Spectrum Internet, you need a Spectrum self-install kit and an active coaxial cable (the same kind of cable used for cable TV) outlet in the room where you want to place the modem.
How to order your Spectrum self-install kit
You can order your self-install kit when you first order your Spectrum Internet® plan. You can choose to have your self-install kit mailed to you, or you can pick it up at a Spectrum store.
What comes in your self-install kit
Your Spectrum self-install kit will come with the following:
- Instructions
- Spectrum modem w/ power cord
- 2 coaxial cables
- Coax splitter
- Ethernet cable
How to connect your Spectrum modem
Step 1: Place your Spectrum modem near a coaxial cable outlet.
Step 2: Take a coaxial cable from your self-install kit and connect one end to the back of the Spectrum modem, and connect the other end to the coaxial wall outlet.
Step 3: Plug one end of the modem power cord into the back of the Spectrum modem and the other end into an electrical outlet.
Step 4: The Spectrum modem will begin to boot up. Wait for the online status light on the front of the modem to go from blinking blue to solid blue. This usually takes 2–5 minutes but can take up to 20 minutes.
This is when you’ll learn if your residence is connected to the Spectrum network. If the online status light goes solid, you’re ready to activate your Spectrum service. If, after waiting 20 minutes, the light is still blinking, you probably need a technician.
Step 5: If you’re using a Wi-Fi router, connect one end of the Ethernet cable that came with your kit to the Ethernet port on the back of the modem and connect the other end to your Wi-Fi router.
If you’re not using a router, connect one end of the Ethernet cable to the modem and connect the other end to the Ethernet port on your computer. However, we don’t recommend this because you lose the added security features that come with using a router.
Issues with a Spectrum self-install
If your modem doesn’t go online (indicated by a solid blue online light), you probably need a Spectrum technician to come set up your internet. If you’re still having issues with your connection after activating your service, use our internet troubleshooting resources to get your Wi-Fi running smoothly.
Start with our guide on how to set up a home Wi-Fi network, as it may help you with general steps you may have missed that apply to any Wi-Fi network.
If your new Spectrum connection is a bit spotty or slow, or if you’re having trouble connecting a device, try our internet and Wi-Fi troubleshooting guides:
Pro install Spectrum Internet®
If you decide to go with professional installation from a Spectrum technician, you should schedule an appointment when you order your services. Here’s what you can expect:
Pro installation breakdown
| Cost | Appointment window | Appointment time |
|---|---|---|
| $65.00 | 1 hr. | 1–3 hrs. |
Data as of 06/04/2025. Offers and availability may vary by location and are subject to change.
How to order a Spectrum professional installation
You may be able to choose a pro install when ordering your services, but the option isn’t always available when ordering online, in which case you can call Spectrum customer service at (833) 267-6094.
How to prepare for a Spectrum professional installation
Here are some preparations you can make to ensure your installation goes as smoothly as possible.
Confirming your Spectrum service appointment
For certain services, you need to confirm your appointment with Spectrum, or the appointment may be canceled. When an appointment requires confirmation, you’ll be notified of when and how to confirm the appointment.
Preparations for your Spectrum professional installation
- Someone 18 years old or older with a government-issued ID must be present during the installation (typically 1–3 hours).
- Ensure access to your utilities. This might be a telephone pole or pedestal in a neighbor’s yard. The tech will also need access to where the cable is grounded (probably somewhere on the side of the house, near the power meter). This isn’t usually applicable for apartments.
- Ensure access to the areas where you want the cable installed. This includes moving any furniture or other items that block access to the cable outlets.
Spectrum pro installation steps
The installation process usually takes between one and three hours, depending on what needs to be done. If complications arise or you need a lot of cable outlets installed, it may take a little longer. These are the general steps to a tech installing cable internet:
Step 1: The tech arrives and reviews the order.
The tech confirms your order and the room where you want your service installed. They will also need to access the nearest cable tap utility and various locations where the cable runs throughout your home.
Step 2: They connect your home to the Spectrum network.
To do this, the tech needs access to the nearest cable tap. This is often located on a nearby telephone pole, a telecommunications pedestal, or a junction box if you live in an apartment.
Step 3: The tech ground the main cable line before it enters your home.
The tech usually grounds the cable line to your power meter box. This step usually isn’t necessary for apartments, but it depends on the utility setup of the building.
Step 4: They then route the signal to the room where you want the equipment installed.
This step is a little different for every home. If your home is prewired with coaxial cable, things are simpler. If you need a new coaxial line run to a room, that’s a bit more of a process, but nothing the tech can’t handle.
Step 5: Next, they’ll set up equipment and explain how to use your service.
This is when the tech will connect your modem and set up your new home network. They also go over how to use your new Spectrum Internet® service.
Equipment: Renting vs. buying Spectrum equipment
Spectrum provides a modem or gateway free of charge, but Spectrum Advanced WiFi costs $10 per month, whether you use Spectrum’s gateway or it’s standalone router. You can save $120 annually by purchasing your own router so you won’t have to pay to use Spectrum’s Advanced WiFi service.
Renting
Pros:
- Costs less up front
- Easy and free tech support and replacement
- Guaranteed compatibility with your Spectrum service
Cons:
- Costs more over time
- May lack some advanced features
Buying
Pros:
- Choose equipment based on your needs
- Keep your equipment even if you switch providers
- Avoid monthly payments
Cons:
- Higher up-front cost
- Some research required
- More difficulty getting tech support
- Spectrum won’t replace it if it breaks
How much does it cost to rent a modem from Spectrum?
Spectrum provides a free modem or gateway, but it charges $10 per month for Advanced WiFi. That’s $120 per year, less than what most ISPs charge (usually around $12 to $15 per month).
How much does it cost to buy my own router for Spectrum Internet?
Router prices can range anywhere from $60 to several hundred dollars. It really depends on your needs. Long-range routers and mesh routers have great coverage and features but tend to be the most expensive. Take a look at our buyer’s guide on the best routers if you need some help choosing your Wi-Fi machine.
Should I buy or rent a modem and router for Spectrum Internet®?
Spectrum’s modem or gateway is free, so we recommend you use it unless you have special circumstances that require something fancier. The same goes for the Advanced WiFi—$10 a month is a good deal when you consider it provides tech support, replacements, and upgrades for your device.
Thinking of buying a router for your Spectrum internet service?
See our 2022’s best routers guide, where we compare the prices, specs, and performance of the best routers.
If you don’t want the hassle of researching and shopping around for a good router (as well as worrying about the router breaking), rent a router from Spectrum.
On the other hand, if you need special features or want more control over your Wi-Fi network, purchasing your own router may be worth it. For example, if you have a large home and need to cover the whole thing, you might want a long-range router or a mesh network. For more information, see our full breakdown of renting vs. buying a modem and router.
Which install option is best for you?
It never hurts to try a self-install. The worst-case scenario is that it doesn’t work, and you proceed to schedule a professional install. However, if you don’t have the time or it’s crucial you get your internet service up and running by a specific date, the safer bet is to schedule the pro install right away.
Decided to go with Spectrum services? Enter your zip code below to see what’s available in your area.
FAQ
Can you install Spectrum Internet® by yourself?
How do I get my Spectrum self-install kit?
How much is Spectrum’s installation fee?
When you move into a new home, the first thing you probably want to do is set up some furniture like your bed, couch, and TV. The second thing you’ll want is an internet connection so you can actually watch something on your TV. This is even more important if you work from home, as you might only have the length of a weekend before you need to be back online Monday morning.
Fortunately, there are a number of ways you can quickly set up your internet to ensure that you miss the minimum amount of work (or relaxation) during your move.
Sponsored


Get the best internet wherever you live!
Moving into a new home, apartment, or condo? T-Mobile has you covered with the best plans, deals, and perks on the market.
On this page:
Best-case scenario | Starting from scratch | Temporary solutions | Bottom line | Additional resources
On this page:
Best-case scenario
The easiest way to get your internet set up in your new home is if it’s already wired for one or more providers. Presumably, the person who lived there before you also had an internet connection, and if it was a wired connection, those cables are probably still there. Apartments and condos often come wired for one specific provider.
If they left the router and other equipment behind, then all you have to do is contact the provider and set up your account. If they took the equipment with them (or returned it, if they were renting), you can still set up your internet the same day if you can make a trip to your provider’s nearest physical location to pick your new equipment in person. Large brands like Xfinity, T-Mobile, and AT&T have at least one location in major cities. If picking your equipment up in person isn’t a practical option, providers can usually have it shipped to you in a day or two.
There are, of course, downsides to going with what’s already installed in your new home. First off, your options are limited to whatever the previous owners had. This probably means only one or two options that might not be your first choice. Additionally, you might not have a connection that meets your needs. Many providers still have much larger DSL or cable networks than fiber-optic networks, so even if your default provider has plans that you like, you might not be able to sign up for them in your new location.
If you’re not using a pre-installed connection, then you have a lot more options. But if you want to get online as soon as possible, you need a connection that’s quick and easy to set up.
Starting from scratch
If you don’t have an internet connection installed in your new home or if you don’t like the options you have, you’re going to have to choose a new provider and install a new connection. Depending on what kind of connection you choose, this process could be either fast or slow.
Want to see all the internet options available in your area?
Enter your zip code below for the full list.
4G/5G home internet: The quick and easy option
The quickest and easiest internet connections to set up from scratch are 4G or 5G home internet connections like . These don’t involve digging up your yard or drilling a hole in the side of your home. Instead, you set up your wireless antenna inside your home in a location with good reception, and you’re set. 4G and 5G home internet use cellular technology, so they have wide availability that reaches most of the U.S. population.
Because there’s no installation, you can also still get 4G and 5G home internet in apartment buildings or restrictive HOAs that would otherwise require you to use a specific provider. This gives you a lot more flexibility and can potentially save you a lot of money on your monthly bill. No installation also means no installation fee, so that’s another nice perk.
Compare 5G home internet providers
| Provider | Speeds up to | Price | Order online |
|---|---|---|---|
|
| 415Mbps | $50.00–$70.00/mo.* w/ Auto Pay | |

| 1,000Mbps | $50.00–$70.00/mo.† | View Plan |

| 1,000Mbps | $30.00–$75.00/mo.‡ | View Plan |
Data as of 6/3/2025. Offers and availability may vary by location and are subject to change.
*w/ Auto Pay. Regulatory fees included in monthly price for qualified accounts. See full terms.
†w/ Auto Pay. Available in select areas.
‡Available in select areas only. Price per month with Auto Pay & without select 5G mobile plans. Fios plan prices include taxes & fees.
Other wireless connections
If you don’t live in an area with 5G or 4G availability, there are other wireless options that don’t require a physical cable running to your home. Unfortunately, these choices require the installation of a dish or antenna on your home, which requires professional installation.
Since these options generally involve mounting hardware to your roof and running a cable through your wall, they don’t really work in apartments or HOAs where you can’t poke holes in the side of the building. In some situations, technicians can install a dish on a freestanding pole in your yard or run the cable through a window. Talk to an agent to see if this might be an option for you.
Unlike other satellite providers, Starlink doesn’t require professional installation. However, due to logistical and network management issues, Starlink customers have had to wait up to 11 months at times for their internet service. So we’re listing it down here, rather than with the quick and easy options above.
Compare wireless providers
| Provider | Speeds up to | Price | Order online |
|---|---|---|---|
 | 150Mbps | $99.99–$119.99/mo.* | |
 | 100Mbps | $49.99–$94.99/mo. for 12 mo.† | |
|
| 150Mbps | $50.00–$165.00/mo.‡ | View Plan |

| 50Mbps | $25.00–$65.00/mo.* | View Plan |
Data as of 05/29/25. Offers and availability may vary by location and are subject to change.
*Prices and availability vary by location. Installation fees, monthly equipment lease fees, and taxes may apply. After 100 GB of High-Speed Data usage, you still have unlimited access to Standard Data, which may result in slower speed.
†Offer for 12 months. Service plans require a 24-month commitment. Equipment Lease or Purchase fees extra. Service plans require a 24-month commitment. Equipment Lease or Purchase fees extra.
‡Plus hardware, shipping & handling fees, and tax. Fully refundable. Depending on location, some orders may take 6 months or more to fulfill.
Wired connections
Wired connections, especially fiber, are generally faster and more reliable than wireless connections. But you’ll have to deal with a professional installation if you don’t already have a line running to your home. If the provider has access from a utility pole, installation can be as simple as running a cable from the pole to your house. (Though getting it inside your house to the right location can be an ordeal in itself.)
Buried cable is much more involved, and requires the technician to identify the location of gas lines and other potential hazards. In either case, many providers can still get your internet up and running within a week. But there can be a lot of variation depending on the provider, your location, and whether the provider has their own installation technicians or contracts it out to local companies.
Fiber and cable networks don’t have the massive coverage area of cellular networks and satellite, so the available providers will vary depending on what area of the country you live in. If you live in an urban or suburban area, there’s likely at least one or two providers that have coverage in your area.
Are you looking for a fiber or cable provider in your area?
Enter your zip code to see all the internet providers in your neighborhood.
Temporary solutions
Sometimes you need the speed of a fiber connection (or you really want that fancy Starlink dish), but don’t have time to get it set up before you move. Rather than settling for a connection that won’t meet your needs, you can find temporary solutions that will keep you online until you can get the plan you want.
If you’re signing up for an internet plan on a temporary basis, you want to avoid anything with long-term contracts or high up-front costs. Here are a few options that fit the bill:
These connections aren’t always the fastest, the cheapest, or the most convenient, but they’ll get you connected right away so you’re not stuck offline in your new place for days or weeks.
Bottom line: Internet now is better than internet later
In our hyperconnected world, there’s often a real cost to being disconnected from the internet, whether that’s time off work or being forced to wait to see the next episode of Shōgun. Fortunately, there are a lot more ways to get online than most people know about, both long-term solutions like and temporary solutions like a mobile hotspot. So whatever your situation, there’s a way for you to get online today.
Additional resources
Moving to a new house? Here’s some resources to help your internet up and running.
You can get internet service in two main ways when you move into a new apartment: Go with your landlord’s recommendation or shop for your own provider. Each method comes with benefits and potential downsides.
We’ll get started with a step-by-step guide for finding an apartment internet service that’s right for you. Then, we’ll discuss the pros and cons of choosing a 5G home internet provider rather than the fully wired internet service your landlord might recommend.
Sponsored
Get the best internet wherever you live!
Moving into a new home, apartment, or condo? T-Mobile has you covered with the best plans, deals, and perks on the market.
In this guide:
Find providers | Determine speed needs | Research plans | Ask the neighbors | Choose a plan | Pros and cons of 5G home internet | Final thoughts
In this guide:
How to choose an internet provider for your new place
Choosing the best internet service for your new apartment comes down to what’s available, how much speed you need, and how much you can afford to spend every month. Let’s get into it.
Step 1: Get a list of available internet providers
Often, your landlord or property management company will give you information about a local internet provider when you sign your lease. Choosing that provider could be your easiest option, but it’s not always best in the long run.
Pro tip: Look beyond your landlord’s preferred provider
Many property managers will tell you about their preferred internet provider when you sign your lease or pick up your keys. Regardless of what they say, it’s highly likely that you have other options for internet service. That could mean faster speeds, lower costs, and better customer service.
We recommend exploring all your options for internet service before you decide.
The best way to find out which internet providers serve your area is to enter your zip code into a tool like the one below. You’ll get a list of providers that offer plans at your new place, plus links to their website.
Ready to start shopping?
Get a list of internet providers at your new address.
Most of the time, a fully wired cable internet provider such as Xfinity, Cox, or Spectrum will be on the list. If you’re lucky, you might also have fiber internet options like Google Fiber, Frontier, or CenturyLink. If you’re a little less lucky, DSL may be the only wired internet provider on the list.
Over the last few years, another internet type has become common: 5G home internet options (also known as fixed wireless internet) from providers including T-Mobile Home Internet, AT&T Air, and Verizon. These plans provide internet access over existing cell phone networks, but you will have your own Wi-Fi gateway and private Wi-Fi network.
Step 2: Determine how much internet speed you need
Next, figure out how much internet speed you need. Faster speeds mean more bandwidth, and that means you can connect more devices without worrying about slowdowns.
If you’re going to live alone in your new apartment, shop for speeds up to 100Mbps. That’s plenty for connecting your smartphone, laptop, and a TV at once. If you’re going to live with two or three people, shop for plans in the range of 250Mbps.
If you’re still not sure what internet speed you need, we have a tool that can help! Just answer six quick questions at the link below.
Step 3: Research internet plans from your list of providers
Once you know your speed requirements, you can enter your exact address into the website of each provider on your list. From there, you’ll get a list of service plans available at the new address.
The best plans have the following features:
- Top speeds of at least 100Mbps
- Free installation
- Free Wi-Fi equipment
Avoid internet plans with the following features:
- Top speeds less than 50Mbps
- Long-term contracts
- Price hikes after a short promotional period
Learn more about internet technology types and how to shop for internet service. If you are moving but like your old provider, learn what it takes to transfer your internet service.
Step 4: Talk to the neighbors
People who live in your building may be the best source of information about internet service at your new place. If you feel comfortable knocking on a few doors or sparking conversations in the mail room, ask your neighbors which providers they use. If that goes well, follow up with questions about how often they see outages and slowdowns, whether there are any hidden fees, and whether they’ve had to contact customer service.
Step 5: Make a decision and schedule installation (or do it yourself)
You’ve done your research, and it’s time to pick a plan. If you’re lucky, you can choose a plan with free self-installation. If that’s not an option, you’ll need to schedule an installation appointment with a service technician.
Either way, we recommend downloading your internet provider’s app on your smartphone during setup. Most of the time, that app is the easiest way to manage your account, control your Wi-Fi network, and get notified about outages and software updates.
Is 5G home internet a good idea for apartment dwellers?
National 5G providers like T-Mobile 5G Home Internet and Verizon are nice alternatives to the fully wired provider your landlord might recommend. T-Mobile has the biggest 5G network in the U.S., and its equipment did well in our real-world testing. Verizon and AT&T also offer 5G or 4G LTE home internet that might be available if your new place is an older neighborhood or a rural area.
The following plans get it right when it comes to price, speed, and quality of service. What’s available to you will depend on your exact location.
| 5G Home Internet Provider | Plan | Speeds | Price | Shop online |
|---|---|---|---|---|
|
| T-Mobile Rely Internet | Up to 318Mbps | $50.00/mo.* w/ Auto Pay | |
 | Internet Air | Up to 225Mbps | $60.00/mo.† | |
|
| 5G Home Internet | Up to 300Mbps | $50.00/mo.‡ |
Data as of 5/30/2025. Lower prices may require bundling with mobile phone service. See disclaimers.
Benefits of 5G home internet
Internet service from 5G providers is easy to install. Just decide where to put your Wi-Fi gateway, plug it into a standard power outlet, log in on the mobile app on your phone, and follow the on-screen instructions to set up your network and devices. It should take about 15 minutes.
Freedom from contracts and the early termination fees they come with is another good reason to choose 5G home internet. If you don’t like the service for any reason, just let your provider know and return your equipment. It’s like it never happened.
Modern Wi-Fi gear is another big benefit of 5G home internet. With each of the top three providers, you get a free gateway that makes it easy to connect your phones, laptops, gaming consoles, and smart speakers. Then, you can control it all in a free mobile app.
Cons of 5G home internet
Fixed wireless internet uses the same technology cell phones use, so it’s subject to some of the same problems. If your apartment is far from the nearest 5G tower or if a lot of your neighbors are trying to get online at once, for example, you could see slower internet speeds. Unfortunately, 5G home internet service is deprioritized relative to mobile traffic on the same network.
Limited plan choice is something else to keep in mind with 5G internet providers. While some cable and fiber internet companies offer a wide range of plans, companies like T-Mobile and AT&T offer only one option for 5G home internet.
Crowded Wi-Fi channels can also be a problem with 5G home internet in apartments. You can usually get around this problem by connecting your high-bandwidth devices (such as a 4K TV or gaming console) directly to your gateway using an Ethernet cable. However, devices you can’t hardwire (like smartphones and laptops) may face signal interference.
Limited router choice is also a consideration. If you choose 5G home internet, your all-in-one gateway is included, and it functions as both a modem and router. If you’ve already invested in a router with all the bells and whistles, it may be wasted on a 5G home internet connection.
Other considerations
Before you decide on home internet for your apartment, It’s important to consider your current mobile phone provider. Every 5G home provider we review offers steep discounts for bundling your home internet plan with one of its mobile phone plans.
On the other hand, it’s possible to bundle mobile phone service with many cable and fiber internet providers, and it’s a good way to save money. Xfinity Mobile, for example, gives you two lines for just $30 each per month if you already have Xfinity internet. Spectrum gives you a free line of unlimited mobile phone service for a year if you already have Spectrum internet, and monthly prices after that first year are just $29.99 per line, if you have at least two lines.
Learn more about mobile and internet bundles.
Final thoughts
We love freedom of choice, and 5G home internet is an exciting new option for apartment dwellers. However, 5G doesn’t offer the same speed and reliability you might have with a cable or fiber internet plan.
Internet over the air isn’t always the best choice for internet in a new apartment, but we think it’s worth a try if you’re unhappy with your other options.
FAQ about apartment internet
How much should I pay for internet for an apartment?
What's the best internet service for apartments?
What's the easiest way to test and track your internet speed?
Is 5G internet good for apartments?
Disclaimers
*T-Mobile
with AutoPay, taxes and fees included.
†AT&T
$60/mo after $5 discount when enrolled in Autopay. Paperless billing req’d. Not available in NY. Monthly State Cost Recovery Charge in TX, OH, NV applies. . Service subj. to Internet Terms of Service at att.com/internet-terms. Offers may be modified, or discontinued, at any time without notice. Other conditions may apply to all offers. Speeds based on wired connection. Actual speeds may vary. For more info, go to www.att.com/speed101.
‡Verizon
w/ Auto Pay. Available in select areas. Consumer data usage is subject to the usage restrictions set forth in Verizon’s terms of service; visit: https://www.verizon.com/support/customer-agreement/ for more information about 5G Home and LTE Home Internet or https://www.verizon.com/about/terms-conditions/verizon-customer-agreement for Fios internet.
You just purchased a newly built home or had one built. The only connections it has right now are plumbing and electrical. But what about the internet? How do you get online without eating up your mobile plan’s data? It’s easier than you might think. I go over your internet options so your new home is online in no time flat.
Sponsored
Get the best internet wherever you live!
Moving into a new home, apartment, or condo? T-Mobile has you covered with the best plans, deals, and perks on the market.
In this guide:
Get internet | Install internet | Install your network | Connect your devices
In this guide:
Step 1: Get the best internet plan
Newly built homes are usually not ready for internet, even though local internet providers have lines buried or strung along utility poles on every street. If anything, new homes are Ethernet-ready.
The lack of an internet connection is good news for you, as you’re not forced to use one specific type. Here are the five types of internet services that may be available to your new home right now.
Fiber uses optical cables to deliver internet to your home. The speeds are generally symmetrical, meaning the upload and download speeds are identical. The fastest residential fiber plan available is 10,000Mbps (10Gbps). However, fiber is the sparsest of the three wired internet connections.
Cable uses cable TV lines (coaxial cables) to deliver internet to your home. Most cable internet networks are now fiber, but providers keep existing coaxial cables in place to reduce costs. The fastest cable internet plan you can get is 2,000Mbps—even higher in the coming years.
DSL uses existing telephone lines to deliver internet to your home. It relies on old technology, so the upkeep is costly and is reflected in your monthly bill. DSL is usually your second landline option if fiber or cable internet is unavailable at your new home—it’s your only landline option if fiber and cable aren’t available. Unfortunately, the fastest plan is 140Mbps.
Fixed wireless uses radio waves to deliver internet from a local cell tower to your home. Services like T-Mobile 5G Home Internet are the easiest to install—just put the gateway by a window and connect your devices. You don’t need a professional install or wired connection like fiber, cable, and DSL internet. Currently, the fastest plan is 1,000Mbps.
Satellite uses radio waves to deliver internet from a satellite to your home. If you can’t get a landline or fixed wireless service, satellite internet is your only option. It requires a satellite dish mounted on a pole or your roof and has the highest latency of the group. The fastest satellite internet plan you can get right now is 150Mbps.
Ready to get internet in your new home? Let's go!
Enter your zip code to see what’s available. We don’t collect your physical address—that’s information the internet provider will collect to determine what you can get at your new home.
Step 2: Schedule the installation or do it yourself
All but fixed wireless internet requires a professional installation. For fiber, cable, and DSL, a technician strings or buries a drop line from the street to your house. The connection is then extended into your home and ends at a modem, gateway, or optical network terminal (ONT), depending on your internet type. Be sure to check out how Metronet installed fiber internet to my home—the install took around two hours!
For satellite internet, a dish is installed on a pole or your house, and then cabling is extended inside to a modem or gateway.
In these cases, you need to schedule an appointment with the internet provider you choose for a technician to come out and install the lines and equipment.
Fixed wireless is an exception
Fixed wireless services like T-Mobile 5G Home Internet don’t require a technician to install them in your home. Instead, you can receive a self-install kit by visiting a physical store or having it shipped to your new address.
Once you receive the kit, you only need to set the gateway near a window that gives you the best reception and connect your wired and wireless devices to it. That’s it!
Check out our guide on how to install T-Mobile 5G Home Internet for more information.


How Much Internet Speed Do You Need?
Est. Time: 60 seconds
Answer 6 questions and get a personalized internet speed recommendation!
How many people in your household use the internet/WiFi on a daily basis?
How many devices in your home connect to the internet, including tablets, gaming consoles, and smart devices?
How many people in your household work from home?
What video quality do you use for streaming TV and movies?
How intensely does your household participate in online gaming?
Does your household download large files from the cloud or via the internet?
Step 3: Install your home network
Many home internet installations now use what’s called a gateway. For cable, DSL, and satellite internet, a gateway consists of a modem and router—or an ONT and router for fiber internet. The technician usually sets up the gateway and any Wi-Fi extenders you may need for better Wi-Fi coverage throughout your new home.
With fixed wireless, the gateway has a 5G modem and a router. Services like T-Mobile Home Internet don’t require a professional install, so you can set the gateway near a window with good reception and connect your wired and wireless devices to it.
Modems require a router
Sometimes, the technician installs a separate modem (or ONT) and router. The latter is configured for you, so all you need to do is connect your wired and wireless devices to it.
If you use a store-bought router, do the following:
- Connect the supplied Ethernet cable to the modem or ONT’s WAN port.
- Connect the other end of the Ethernet cable to the router’s WAN port.
Sometimes, the router has two WAN ports, so you’ll need to specify which one you want to use when you set it up for the first time. Always select the multigig one for 1,000Mbps plans and faster.
Mesh systems are ideal for whole-home Wi-Fi
Many internet providers now supply you with a mesh system instead of a standalone router, whether you have a gateway, a modem, or an ONT. The technician usually sets this up for you during your scheduled appointment. Just connect your wired and wireless devices to the system, and you’re good to go.
If you use a store-bought mesh system, do the following:
- Connect one end of the supplied Ethernet cable to the WAN port (or any Ethernet port in some cases) on the first mesh system unit.
- Connect the other end of the Ethernet cable to the WAN port on the modem or ONT.
- Follow the setup instructions to connect the remaining mesh system nodes and set up your Wi-Fi network.
If you don’t want two Wi-Fi networks flooding your new home, disable the gateway’s Wi-Fi. For example, Plume’s instructions for various AT&T models provide different instructions on how to do this.
Step 4: Connect your devices
With your home internet installed and your Wi-Fi up and running, you can now connect your wired and wireless devices to your home network.
Connect your wired devices
Connect an Ethernet cable from the Ethernet port on your device to one of the LAN ports on the router, gateway, or mesh system. Wired speeds don’t fluctuate like Wi-Fi speeds, so they’re best for gaming, streaming, and downloading files quickly.
Connect your wireless devices
Open your device’s Wi-Fi settings, select your home network’s Wi-Fi name, and enter the supplied password. That’s it. Consult our guide on how to get home internet on your Wi-Fi devices for more information (if you need it).
Bottom line: Fixed wireless is the easiest internet to get
The quickest and easiest way to get internet service in your new home is to go with T-Mobile 5G Home Internet or another 5G home internet provider. There’s no pro installation required. All you do is place the gateway in an area with good reception and connect all your devices to it. There are no wires and no scheduling shenanigans—just quick and easy internet you can get up and running in minutes.
But if you need more speed than what you can squeeze out of fixed wireless, go with fiber or cable internet. The latter is more commonplace than fiber, but that’s slowly changing. Go with DSL if it’s your only landline option or satellite if no other internet connection is available to you.
T-Mobile 5G Home internet is one of the easiest internet services to install yourself. There’s no networking cabling, no technician appointment, and you don’t even have to wait for a modem in the mail. You can waltz into a T-Mobile store, sign up for a plan, grab your free rental modem, and be up and running after a breezy 15-minute self-install.
In our home test of T-Mobile 5G Home Internet, the entire process (including signing up, picking up the modem from a T-Mobile store, and installing the service) took just over an hour. That’s something we cannot say about any other ISP.
T-Mobile has made it really easy to switch over. Here’s how you get started with a new T-Mobile internet plan.
Now is a great time to sign up for T-Mobile 5G Home Internet
| Plan | Cost | Speed | Details | Order online |
|---|---|---|---|---|
| Rely Home Internet | $50.00/mo.* w/ Auto Pay | 87–318Mbps |
| |
| Amplified Home Internet | $60.00/mo.* w/ Auto Pay | 133–415Mbps |
| |
| All-In Home Internet | $70.00/mo.* w/ Auto Pay | 133–415Mbps |
|
* with AutoPay, taxes and fees included.
In addition to the great deal above, these limited-time perks are included if you sign up for T-Mobile now:
- Get $50 back when you switch to T-Mobile Home Internet via Virtual Prepaid Mastercard® in 12 weeks.
- Get Paramount+ Essential free for one year.
- Enjoy SiriusXM free for 6 months.
T-Mobile 5G Home Internet self-installation
- No appointment
- No cost
- No networking cables
- No wait (if you opt to pick up your gateway)
Cost: Free
What you need: T-Mobile internet gateway, device with T-Mobile Internet app (iOS or Android)
How long it takes: Approximately 15 mins
Will T-Mobile self-installation work for me?
T-Mobile’s self-install can be completed in minutes and is designed to work for just about anyone. All you need is your T-Mobile internet gateway and a smartphone with the T-Mobile Internet app installed. Your self-install kit will include a quickstart guide that tells you how to set up the internet gateway and install the T-Mobile app. The T-Mobile Internet app walks you through the rest.
Because T-Mobile’s 5G Home Internet is so easy to set up, an installation appointment with a tech isn’t necessary or even an option. A self-install is the only way to install T-Mobile 5G Home Internet.
If you run into a problem with your T-Mobile Internet self-installation, you can contact T-Mobile customer support.
How long does T-Mobile 5G Home Internet self-install take?
Installing your T-Mobile Internet takes about 15–30 minutes.
How to self-install T-Mobile 5G Home Internet
To install T-Mobile Internet, you need your T-Mobile self-install kit and a smartphone with the T-Mobile internet app. All you do is scan a QR code on the bottom of the T-Mobile gateway and the app walks you through the rest.
What comes in your self-install kit
Your T-Mobile self-install kit includes the following:
- T-Mobile Internet Gateway
- Power adapter
- Quickstart guide
Check your internet speed
Use our speed test to ensure you get the most out of your new internet service.

Looking for an easy way to test and track your internet speed on your phone?
Download our free, easy-to-use speed test app for quick and reliable results.


T-Mobile Internet self-install step by step
Step 1: Download the T-Mobile Internet app on the Google Play store or the iOS App Store.
Step 2: In the T-Mobile Internet app, scan the QR code on the bottom of your T-Mobile Internet gateway.
Step 3: Choose a good spot to place your T-Mobile Internet gateway.
Because T-Mobile 5G Home Internet receives data via cellular signal, the gateway should be placed somewhere near a window (not in direct sunlight) and preferably on the top floor of your home. This way, there are fewer obstructions between your gateway and the cellular signal.
You can use the T-Mobile Internet app to fine-tune your gateway placement as the app tells you when the gateway is in a good location.
Step 4: Connect the gateway to power and wait while it boots and connects to the T-Mobile 5G network.
Step 5: Follow the instructions in the T-Mobile Internet app.
Step 6: Test your connection with an internet speed test.
Issues with a T-Mobile 5G Home Internet self-install
Installing T-Mobile Internet is so straightforward that you’re unlikely to run into any problems as long as you follow the instructions. But if you do run into an issue, try these easy fixes first:
- Check that your T-Mobile gateway is powered on and has a good 5G signal. You can see the gateway’s signal strength on the gateway’s LCD display.
- Make sure your device is connected to your T-Mobile Gateway’s Wi-Fi.
- Restart your T-Mobile gateway. This allows the gateway to clear out any glitches and start fresh.To restart your T-Mobile gateway unplug the power cable, wait 30 seconds, then plug the power cable back in. Wait a few minutes while the gateway boots and reconnects to the T-Mobile 5G network.
If you’re still having trouble, you can contact T-Mobile Internet customer support.
What to do if your T-Mobile Internet is working, but the internet connection is slow or spotty
Your issue may be due to a home networking issue rather than a problem with your new T-Mobile internet.
Start with our guide on how to set up a home Wi-Fi network, as it may help with general steps you missed.
Next, try our internet and Wi-Fi troubleshooting guides:
T-Mobile 5G Home Internet equipment rental
One of the best perks of T-Mobile’s Home Internet plan is a free internet gateway rental, saving you around $10–$15 per month on your internet bill. And we’re happy to report that the T-Mobile internet gateway is an excellent modem/router.
In our home test of T-Mobile 5G Home Internet, the T-Mobile gateway exhibited good speeds and Wi-Fi range. The gateway also includes some nice quality-of-life touches, like being able to view connected devices and receive messages from T-Mobile directly on the gateway’s LCD display.

T-Mobile’s free rental gateway is easy to set up and use. Austin Aguirre | HighSpeedInternet.com
Should you get T-Mobile 5G Home Internet?
We performed a home test of T-Mobile’s 5G home internet to help you decide whether or not it’s a good option for you. Our conclusion? Yes, T-Mobile is one of the best internet deals out right now. It’s fast enough to handle the internet needs of most customers and its very affordable internet plan includes every perk in the book, like unlimited data, free rental equipment, and no term contract.
And we’re not alone in our praise for T-Mobile’s internet service. T-Mobile was the top-performing ISPs in our annual customer satisfaction survey, even outperforming some ISP giants, like Xfinity, AT&T, and Spectrum.
If you’re looking for an alternative to your usual ISPs, we strongly recommend you take a look at T-Mobile 5G Home Internet.
Decided to go with T-Mobile 5G Home Internet?
Enter your zip code below to see if T-Mobile 5G Home Internet is available in your area.
FAQ about installing T-Mobile 5G Home Internet
Can you install T-Mobile 5G Home Internet on your own?
How much is a T-Mobile 5G Home Internet installation?
How fast is T-Mobile 5G Home Internet?
You can install internet by yourself if your home is wired properly for internet service and if your provider has a self-installation option available.
Self-installation isn’t always an option—some providers require a professional to install your internet service because of wiring issues and other complications. But if self-installation is available, it’s a great way to cut down on extra internet costs. You can use a kit to set everything up, so there’s no need to pay for a technician to come over. Setup is relatively easy, too, so long as you have a bit of technical know-how.
Here’s everything you’ll need to figure out whether you can install your internet by yourself, how to install your own internet, and how much a self-installation will cost.
Looking to get internet?
Are you shopping around and looking for a way to get new internet at your home? The first step is running a search with your zip code below to see what internet plans are available in your area–then you can look at pricing and sign up from there.
How do you install internet?
| Provider | Self-install? | Installation costs | Contact for setup | View installation guide | View plans |
|---|---|---|---|---|---|

| Yes | Free (self-install), $39.99 (Self Install Plus) | 1-800-934-6489 | View Installation Guide | View Plans |
| | Yes (in some cases) | Free (self-install), $99.00 (pro installation) | 1-800-288-2020 | View Installation Guide | |

| Yes | $24.99 (self-install), $59.99 (pro install) | 1-855-707-7328 | View Installation Guide | View Plans |
 | Yes | $25.00 (standard install), $129.00 (pro install, waived for fiber plans) | 1-866-642-0444 | View Installation Guide | |

| Yes | Free | 1-800-746-4726 | View Installation Guide | |

| No | $19.95 installation (fiber plans), $39.95 (DSL and fixed wireless plans) installation, $79.95 professional installation | 1-866-383-3080 | N/A | View Plans |

| Yes (in some cases) | Free fiber expert installation, $100 for DSL plan | 1-877-650-7509 | N/A | View Plans |

| No | $50.00 (activation), $35.00 (pro install) | 1-833-597-1029 | View Installation Guide | View Plans |
|
| No | Free | 1-800-922-0204 | View Installation Info | View Plans |
|
| Yes | Free | 1-800-937-8997 | View Installation Info | View Plan |
Depending on the internet provider and plan you get, you can install your new internet package by doing it yourself or by hiring a professional technician to do it for you.
When you choose to self-install, your internet provider will send you an installation kit in the mail. Once it arrives, follow the instructions to plug everything in and get your Wi-Fi working.
Not all internet providers have self-installation options, though. That’s because some homes don’t have the right wiring installed—especially for newer technologies like fiber and 5G home internet. It’s likely you won’t be able to self-install if you don’t have phone or coaxial jacks on your walls, or if there isn’t a optical network terminal for fiber installed somewhere in the house.
If that’s the case where you live, you’ll need a technician to set everything up. They might even need to lay cable underground or run wiring from your home into a utility box on the street.
Pro tip:
Self-installation is usually your cheapest option, but you can often get deals on professional installation too. Take a look at our best internet deals page for the latest installation discounts.
How to self-install internet in 5 steps
There are a few basic things you’ll need to do to get that internet gravy flowing with your self-installation. Of course, not all providers are the same, so we have more details about specific internet providers farther down on this page, along with links to more detailed installation guides.
Step 1: Pull your modem or gateway (a standalone modem/ONT and router unit) out of the box and connect it to the wall. Depending on your internet type, you’ll need to plug your DSL modem or gateway into a phone jack, your cable modem or gateway into a coaxial jack, or your fiber gateway into an optical or Ethernet jack.
If you have a gateway, move on to Step 3. For modems, continue to Step 2.
Step 2: Plug your DSL or cable modem into your router with an Ethernet cable.
Step 3: If possible, place your router or gateway in a centrally located part of your home so the Wi-Fi signal can travel better. Keep them away from walls, bulky furniture, and electrical appliances that might interfere with its radio signals.
Step 4: Once you plug them in, check to make sure your router and modem (or gateway) are blinking properly. The light indicating the status of your internet connection is typically labeled WAN, Internet, or with a globe icon. You can tell it’s working if the light is solid or blinking.
Step 5: Sign on to your Wi-Fi. Look for your router’s SSID (the name of your Wi-Fi network) in the Wi-Fi menu on your phone, computer, or other device. Type in the network’s default password—it’s usually printed on your router or on the box it came in.
Voila! You’re online. If you need more details, head farther down this page for more details about installation from specific providers.
Pro tip:
Once you’ve finished setting everything up, take an internet speed test to make sure you’re getting the speeds you’re paying for.
Sometimes Wi-Fi speeds fluctuate. We recommend running multiple speed tests throughout the day to see if your bandwidth changes.
What’s better: self-installation or pro installation?
If it’s available to you, self-installation is better for internet service because it saves you money and doesn’t require setting up an appointment with a technician.
However, self-installation requires a bit of technical skill. And you’ll have to handle technical issues and troubleshooting on your own, which can be frustrating. So hire a pro if you want to be completely hands-off.
Professional installation usually costs anywhere from $40 to $85, depending on the provider. Self-installation is often much cheaper, ranging from $30 all the way down to no extra cost at all. But you still may be on the hook for activation fees and shipping costs.
Pro installation
Pros:
- Technician handles all issues
- No technical knowledge required
Cons:
- Installation fees can be expensive
- Appointment times may be inconvenient
Self-installation
Pros:
- No required appointments
- Lower installation fees (or none at all)
![]() Cons:
Cons:
- Some technical knowledge required
- Troubleshooting and technical problems fall on you to solve
Want to compare the best internet plans in your area? Enter your zip code below.
Pro tip:
Want some tips on how to make switching internet providers go smoothly? Read our guide to transferring your internet for a hassle-free experience.
What equipment do you need to install your internet by yourself?
You’ll need a self-installation kit to set up your internet and get the Wi-Fi flowing throughout your house. You will also need a modem and a router, which you can either rent from your internet provider or buy yourself.
A self-installation kit usually includes these important items:
- Modem/router (if you’re renting one from your provider)
- Coaxial or phone cable
- Power cord
- Ethernet cable
If you have fiber internet, you’ll use an optical cable instead of a coaxial or phone cable. However, it’s unlikely that you’ll be able to set up fiber internet on your own.
Pro tip:
Confused about which cables are which? Read our guide to connecting a router for a helpful diagram.
Which is the best router to buy for home use?
The best router to buy for home use is Google Nest Wi-Fi, a mesh system that gives you the fastest possible speeds and coverage of up to 2,200 square feet.
Amazon.com Price (as of 8/4/2021 10:15 MST). See full disclaimer.
But really the best router depends on your home setup and what you’ll use the internet for. We have a bunch of recommendations on different routers and their strengths—take a look to see which is best for you.
- Best Wi-Fi Routers
- Best Wi-Fi Routers for Online Gaming
- Best Wi-Fi Routers for Streaming
- Best Long-Range Routers
Taking us back to the topic of installation, we’ve got more details down below on what you’ll want to know as you set up Wi-Fi from various internet providers.
Search your zip code below to see which of these providers offer internet service in your area.
Details
- Self-install kit: $14.99 shipping charge (free in-store pickup)
- Self Install Plus: $39.99
- Pro Install: $100
Xfinity self-installation
Xfinity charges $14.99 to ship your self-install kit to you. A kit will be sent to you over standard shipping, which will take three to five business days to arrive. You can also delay your shipment by up to 25 days if you’re not ready to receive the kit yet.
If you’re in a hurry, you can have the self-install kit sent over priority shipping for $29.95. That reduces the shipping time to one to two business days.
To avoid the shipping fee altogether, you can choose to pick up your self-install kit from an Xfinity retail location. We recommend calling first to make sure they have the kit in stock.
Xfinity offers a Self Install Plus for $39.99. A technician will come to your house with your self-install kit. They’ll help you set everything up and make sure the connections work.
An Xfinity professional installation costs $100.
Details
- Self-install kit: Free ($49 activation fee may apply)
- Pro install: $99.00 (required for DSL)
AT&T self-installation
You can opt for free self-installation with many AT&T plans, but sometimes a $49 activation fee may apply. You will need to pay for the pro installation in some circumstances—namely, if AT&T doesn’t have fiber-to-the-home wiring set up in your place already. Professional installation can cost you up to $99.00 but often that fee is waived for the fiber 1 gig and higher plans.
Find out with installation option is best for you with our AT&T Install Guide.
Details
- Self-install kit and activation: $19.99
- Pro install: $49.99
- WiFi Pod install: $49.99
Spectrum self-installation
Spectrum combines the self-install kit and service activation into a one-time fee of $24.99. Professional installation is usually $59.99.
Learn how to install Spectrum internet and more with our Spectrum internet installation guide.
Details
- Standard installation kit: $25.00
- Pro install: Up to $129.00
- Phone jack install: $85.00
CenturyLink installation
According to CenturyLink, standard installation costs $25, and professional installation can cost up to $129. Standard installation is basically a self-install option in which you use a kit to set everything up yourself. Pro installation means a technician comes to your house to get your internet going. You don’t have to pay any installation fees if you get CenturyLink’s fiber gigabit plan.
You may need to pay $85 for a phone jack for DSL service if you don’t already have one installed in your home. Also, CenturyLink fiber internet will require a more involved setup at some homes, if an optical network terminal isn’t already set up.
Be sure to check out our CenturyLink Install Guide for more details on getting your service up and running.
Details
- Self-install kit: N/A
- “No-contact” install: $79.95 (free with coupon code)
Astound Broadband powered by RCN self-installation
Astound Broadband (RCN) has no-contact installation, so basically a technician comes to your place with the kit to set everything up and then stands in the doorway (or somewhere at a safe distance) and gives you step-by-step instructions. The technician can come inside with your permission to resolve any issues.
Installation from Astound technically costs $79.95, but you may be able to get a break on pricing, depending on your service area.
Details
- Professional install: $19.95 for fiber plans, $39.95 (for other plans)
- Activation Fee: $79.95 (for fixed wireless)
EarthLink self-installation
EarthLink uses other internet providers’ networks to give you a connection, so it leaves installation to its network partners as well. EarthLink relies on the other providers’ technical-support services too. So if you have a problem, you’ll have a technician coming to your house in a non–EarthLink branded van.
Professional installation costs $19.95 for fiber plans and $39.95 for other plans. Fixed wireless customers can self-install, but there is a $79.95 activation fee.
Frontier self-installation
Expert installation for Frontier’s fiber plans are free. Frontier also offers self-installation for some fiber plans.
Details
- Activation: $50.00
- Install: $35.00
- Internet-ready phone jack install: $65.00
Kinetic self-installation
Kinetic requires a $50 activation fee (required even if you self-install) plus a $35 installation fee for professional installation. You can elect for self-installation, but you’ll need a special “internet-ready” phone jack installed in your house.
DSL internet uses regular phone jacks to give you internet service. But if you have phone service in addition to DSL, you need a splitter in order for both your internet and phones to work at the same time. A splitter—which you can find for cheap on Amazon—filters out all the high frequencies that are used by your DSL signal so that only the vocal frequencies come out the phone.
It’s unclear from Kinetic’s website if that phone jack is any different than a regular phone jack in most peoples’ homes, if it comes with a built-in splitter or anything like that. But installing a jack costs $65. If you choose self-installation, Kinetic will mail you a kit.
Amazon.com Price (as of 8/4/2021 10:15 MST). See full disclaimer.
T-Mobile Home Internet self-installation
You don’t need a pro to set up T-Mobile’s new, 4G LTE– and 5G–based home internet service. According to one review of how it works, you’ll get a package in the mail with a T-Mobile Home Internet Gateway (a combination modem/router).1 You’ll then need to follow the instructions on the T-Mobile Home Internet app to set everything up.
This is a fairly new service, so you may need to fiddle around a bit with the settings to make sure everything works correctly. But setup is simple, and it doesn’t cost extra.
Verizon 5G Home Internet installation
Professional installation is required with Verizon’s 5G Home Internet service. It’s a new technology, and it may take a little extra effort to dial in the connection properly. A technician will come to your house to install a 5G Internet Gateway—a combination modem/router that’s designed to pick up radio signals from a 5G cellular transmitter on the street.
Installation doesn’t cost extra—just set up an appointment when you sign up for the service.
Looking for a sweet new internet setup? Search below to see what’s available in your area.
Sources
- Rick Broida, CNET, “T-Mobile’s $60 Home Internet Service: The Cheapskate Review,” May 5, 2021. Accessed June 23, 2021.
Disclaimer
Product prices and availability are accurate as of the date/time indicated and are subject to change. Any price and availability information displayed on Amazon.com at the time of purchase will apply to the purchase of this product. HighSpeedInternet.com utilizes paid Amazon links.
CERTAIN CONTENT THAT APPEARS ON THIS SITE COMES FROM AMAZON. THIS CONTENT IS PROVIDED ‘AS IS’ AND IS SUBJECT TO CHANGE OR REMOVAL AT ANY TIME.
Installation is the most annoying part of getting new internet. You have to schedule appointments with a technician, fiddle around with tangled cables, and fork over extra fees on top of your monthly bill—as if internet wasn’t expensive enough already!
But installation can go smoothly. Perks—including free installation or self-installation kits—can help you get your Wi-Fi up and running with minimal hassle. We’ve got the lowdown on which providers give you the hookup.
Pro tip:
Before you sign up with a new internet provider, see what’s available in your area. You may find a better provider that wasn’t on your radar.
Get free self-install from Xfinity
It’s all about self-installation when it comes to Xfinity. One of the biggest internet providers in the country, Xfinity has a wide range of internet packages, and all come with a self-install kit as the default installation option.
Inside the kit, you’ll have everything you need to get your home Wi-Fi up and running, including Ethernet cables and a gateway router (which costs a monthly rental fee). You’ll need a little tech know-how to set up the Wi-Fi yourself, but it’s no big deal—Xfinity has an app to help you through the process, and we can walk you through that too.
How do you get it?
Sign up for an internet plan on Xfinity’s website , and select the self-installation kit as your installation option. The kit will arrive at your home in three to five business days. You can pay extra for priority shipping or choose to delay shipping by as long as 25 days if you’re not ready to get the kit yet.
Xfinity also has a Self-Install Plus option (basically professional installation) for $39.99.
Find a cheap pro-install option from AT&T
Some AT&T plans let you pick self-installation for free, just like Xfinity. Other cases require professional installation—mainly if you’re signing up for one of AT&T’s fiber plans, since a fiber setup usually needs a professional to connect wiring to a utility box on the street.
If you go pro with AT&T, the cost if free for a fiber plan but professional installation for a DSL plan will cost $99.00. You may be able to get a Visa prepaid card as a sign-up bonus as well to offset the cost.
How do you get it?
Look at your installation options when you’re signing up for an internet plan—AT&T will let you know whether AT&T self-installation is possible at your place. Meanwhile, check in with customer service to make sure you’re getting any available discounts or deals.
Pro tip:
AT&T often hooks up customers with limited-time promotions and discounts, so be sure to look over our best internet deals for the latest.
Score top-tier customer service from Verizon
Verizon is probably best known for its fast Fios fiber speeds and cheap 5G home internet plans, but what the provider really excels at is dependability. A Fios plan gets you a consistent internet connection over a fiber-optic network that is well-maintained, up-to-date, and immune to electromagnetic interference. And if there are any issues, Verizon makes it easy to contact customer care. You can even get technical support over the Verizon app.
Our annual customer satisfaction survey shows Verizon received top and near-top rankings for reliability and customer service, beating out 14 other providers. So if you’re having trouble with your connection, reach out to Verizon and an agent can help you out.
How do you get it?
You can get self-install on most EarthLink plans for a small fee, but fiber plans require you to opt for professional installation. So pick whatever installation option is available and most affordable to you as you’re signing up for an EarthLink plan. Then call customer service at 866-383-3080 to go over any questions or concerns.
Chill with “no-contact” installation from Astound Broadband
Astound Broadband is perhaps best known for its seemingly bottomless cornucopia of promotions, discounts, and deals, which are routinely available to new customers. These include free installation coupons that you can find on Astound Broadband’s website .
But another big plus with Astound Broadband is its “no-contact” installation policy, which gives you professional, socially-distanced installation. Here’s how it works: a technician will come to your house with the installation kit. Then they’ll stand at the doorway (or at an otherwise safe distance) and explain to you how to hook everything up. If you don’t mind someone in your home, you’re free to let them in as they troubleshoot potential issues.
How do you get it?
Sign up for an Astound Broadband plan online—and don’t forget to use a coupon code specific to your service area to get installation at no extra cost. Set up an appointment for a technician to come by and work with them to plug in all the router cables correctly.
Find a flexible setup from T-Mobile Home Internet
T-Mobile Home Internet is a relatively new service that uses wireless signals from 4G LTE and 5G towers to give you a fast and versatile internet connection. You don’t need a professional to set it up, and you don’t need any special wiring in your house either.
Installation is free—yay! You can set it all up yourself after T-Mobile sends you a gateway (a fixed-wireless modem/router) and your new account information.
How do you get it?
First you’ll need to search your address on T-Mobile’s website to make sure you can get T-Mobile Home Internet—availability is still somewhat limited. Once you’ve confirmed that, go ahead and sign up for a plan. T-Mobile will send everything you need in the mail. From there, it’s just a matter of plugging in the right cables to the right places.
Want to see if you can get any of these great internet provider deals on installation in your area? Run a search with your zip code below.
The majority of Frontier customers need an expert installation, which requires an appointment with a broadband technician. But some customers may have the option to self-install their Frontier internet service with a self-install kit.
Both options have their advantages—let’s go over each one and find out which is best for you.
Expert installation vs. self-installation
Expert install
Pros:
- Tech performs entire install
- Ability to move modem/router to a different room
- A more thorough setup/checkup of your home network
Cons:
- Requires an appointment
- Longer time commitment
Self-install
Pros:
- No appointment necessary
- Quick and easy setup
Cons:
- Might not work
- Limited availability
Self-install Frontier Internet
Cost (may be waived):
DSL: $85 activation fee
Fiber 500: $50 activation fee
Fiber Gig 1,2, & 5: $25 activation fee
What you need: Self-install kit, active connection to the Frontier network, eligible internet plan and address
How long it takes: 30 minutes
Will a Frontier self-install work for me?
The first step is to figure out if your address and internet plan are eligible for a self-installation. Those able to self-install should be presented with the option when signing up.
However, even if it’s eligible for a self-installation, there’s still a chance that it won’t work. For a successful self-installation, your residence needs an active connection to the Frontier network. Most ISPs rely on service records to determine if an address is connected to the network. This system works most of the time but isn’t perfect. The only way to really know if a self-install is going to work is to try it out.
Self-install is a good option if:
- You’re eligible for a self-installation
- The residence has recently had Frontier services.
- You’re comfortable setting up your equipment.
- You can afford to wait for an expert install appointment in the event the self-install doesn’t work.
How long does a Frontier self-install take?
You can complete the Frontier self-installation in about 30 minutes.
Expert installation for Frontier Internet
Cost:
DSL: $85 activation fee
Fiber 500: $50 activation fee
Fiber Gig 1,2, & 5: $25 activation fee
What you need: A person over 18 present
How long it takes: 2–4 hours (approx.)
For an expert installation, a technician will come to your home and install your new internet service. You’ll need to schedule an appointment, and someone over 18 must be present during the installation.
An expert install comes with more flexibility and security and is more likely to work than a self-install. If something goes wrong, the tech can make repairs or adjustments on the spot, which means you should still get online when you plan to. Additionally, the tech can help you move your equipment to the ideal location in your home, and perform a thorough quality check of your home network.
A professional installation is a good option if:
- Your residence has not recently had or never had Frontier services.
- You want to move your frontier modem/router to a different room.
- You want your home network professionally assessed.
- You don’t feel comfortable setting up your equipment yourself.
How to self-install Frontier Internet®
To self-install your Frontier service, you first need your self-install kit. Once you have your kit, your set up should take about 30 minutes.
How to order your Frontier self-install kit
If you’re eligible for a self-installation, you can order your self-install kit when you sign up for your Frontier internet service. If you’ve already ordered your service but wish to switch to a self-install, try contracting Frontier Customer Service to get help.
What comes in your self-install kit
- Frontier router
- Power cable
- Ethernet cable
- Phone line cable
Before you start
You can only self-install your frontier internet on or after your service ready date.
How to connect your Frontier router
Step 1: Connect the data cable.
For Fiber: Connect one end of the white Ethernet cable to the port on the wall; connect the other end to the red Ethernet port on the router labeled ONT
For DSL: Connect the green phone cable to the phone jack on the wall; connect the other end to the green port on the router, labeled DSL.
Step 2: Connect the router to power.
Connect the power adapter to the AC port on the modem labeled Power. Plug the power adapter into a power outlet. Turn on the router using the power button on the back. Wait while the router boots (up to 20 minutes).
Step 3: Check for an internet connection
The internet light on the front of the router should be solid blue once the router is fully booted. If the light is not solid blue, the router isn’t properly connected to the internet. If this happens, try our troubleshooting tips.
Step 4: Connect your devices to your new home network
Wireless devices (Wi-Fi): You can find your network names and passwords on the bottom of your Frontier router. Your frontier router may have two different Wi-Fi networks: a 5 Ghz Wi-Fi network and a 2.4 GHz Wi-Fi network. Each of these networks has its own strengths—learn which to use in our Wi-Fi guide.
Step 5: Test your new network speeds.
Use our speed test to make sure your new internet connection is working properly. Use your Frontier internet plan speed as a reference.
Step 6 (optional): Change your Wi-Fi network name and password.
You can customize the network name and password by typing the following into your web browser: http://192.168.254.254.
This will open your Frontier router’s setting page, where you will need to enter an admin name and password. This will be a different name and password than those used for your Wi-Fi network. You can find your router login name and password on the bottom of your Frontier router.
Issues with a Frontier self-install
If your modem doesn’t go online (indicated by a solid blue online light), make sure your cables are attached correctly. Also make sure you’re on or past your service ready date.
If your cables are set correctly and you are within the time-frame of your ready date, you probably need a technician to come set up your internet.
If your Frontier router’s internet light is solid blue but you’re still having issues with slow or spotty internet, use our internet troubleshooting resources to get your Wi-Fi running smoothly.
Start with our guide on how to set up a home Wi-Fi network, as it can help you with general steps you may have missed.
How to get an expert installation for Frontier Internet®
You can schedule your expert installation when you order your Frontier internet service. You can also schedule an expert install by contacting Frontier customer service if your self-install doesn’t work.
How to prepare for a Frontier expert installation
- Have someone 18 years of age or older present during the installation.
- Move any furniture or belongings away from your home’s networking outlets.
- Ensure the tech has access to the networking box or ONT. This box may be on the outside of your home (usually near the power meter), in the garage, or in an interior closet. The tech may also need access to your attic or crawl space.
Renting vs. buying Frontier equipment
Frontier charges $10 a month to rent their internet equipment, though some plans and offers may include a free use of equipment. Frontier is a little different than other ISPs in that you must use frontier equipment to install internet service. You may be able to switch out the rented equipment for your own later.
How much does it cost to rent a modem or router from Frontier?
Frontier charges a rental fee of $10 per month for internet equipment, though rental equipment does come free with certain plans.
Should I buy or rent a modem and router for Frontier Internet®?
In the beginning, you don’t have a choice—you must use Frontier’s equipment. But using a frontier rental router comes with full tech support. Additionally, Frontier doesn’t guarantee performance on third-party equipment, so it’s best just to go with the rental equipment.
Which install option is best for you?
Most Frontier customers require an expert installation, so we recommend planning for one. An expert install requires more planning and a longer time commitment, but it also comes with more help if any issues come up during the install.
If you are eligible for a self-install, it doesn’t hurt to try. The worst-case scenario is that it doesn’t work, and you proceed to schedule an expert install. However, if you don’t have the time or it’s crucial you get your internet service up and running by a specific date, the safer bet is to schedule the expert install right away.
Decided to go with Frontier services?
Enter your zip code below to see what’s available in your area.
FAQ
Can you install Frontier Internet® by yourself?
How do I get my Frontier self-install kit?
How much is Frontier’s installation fee?
Suddenlink Communications provides cable, TV, and telephone service throughout the United States. This Internet Service Provider (ISP) delivers internet service to homes through cable lines, which usually provide faster speeds than DSL. You can find Suddenlink in sixteen states, including rural areas of Arkansas, Missouri, and New Mexico. Despite its rural underpinnings, the ISP offers speeds starting at 50 Mbps and up to 1 Gbps in select locations. If you choose as your ISP, know that you will receive 24/7 customer support and a money-back guarantee. You will also benefit from access to reliable service technicians and unlimited data plans.
Jump to: How to self-install Suddenlink internet | How to activate Suddenlink account | Common installation issues | Self-install vs. Pro-install | Modems and routers | Contact Suddenlink
Haven’t signed up for Suddenlink service yet? Check to make sure it’s available in your area before you research installation.
Step by step guide to Suddenlink self-installation
When you place your initial order with Suddenlink Communications, you can choose to either have a technician come to your home to set up the equipment or to install it yourself. If you choose to install it yourself, follow the directions below.
1. Note your activation date
Even if your box of Suddenlink equipment arrives twenty-four hours after placing an order, you should wait until your activation date to connect the equipment. You won’t be able to test the service or set up your account before your activation date.
2. Check the Suddenlink equipment
Your box of Suddenlink equipment should contain six items: cable modem, power adapter, coaxial cable, Ethernet cable, two-way cable splitter, and instructions. If anything’s missing from your box, contact Suddenlink Customer Support at 1-877-794-2724.
Looking for a good modem or router?
We’ve got you covered. If you don’t want to use Suddenlink’s provided equipment, here are our recommendations of what to use instead. Before you buy any of these, check to make sure they’re compatible with Suddenlink. The equipment’s tech specs are usually the best place to check:
3. Choose a location
Scout your home for a centralized location with access to both cable and power outlets. Finding a good spot will help transmit the internet signal throughout your home.
4. Turn off the computer
Whether you’re using a desktop or laptop, power it down before continuing. Doing this can help prevent signal confusion and interference during the installation and activation phases.
5. Connect the modem
Connect the coaxial cable to the cable wall outlet and the port labeled “Cable In” on the back of the modem. Plug the power cord into a wall outlet and connect it to the modem.
6. Plug in the Ethernet cable
With the modem connected to the cable line and receiving power, plug in the Ethernet cable and connect it to either your computer or router.

7. Look for the LED light
If all the connections are secure and working properly, the “Online” LED light on the front of the modem will turn a solid color.
8. Turn on the computer
Once you turn on the computer, you will need to run through either the Internet Connection Wizard (Windows) or System Preferences (Mac OS).
9a. Run the internet connection wizard (Windows only)
- Click the “Start” button. It’s usually in the lower left-hand area of the screen.
- Click “Run.”
- When the window opens, type “INETWIZ” and click “OK.”
- The Internet Connection Wizard will open. When it does, select “Connect using my local area network (LAN)” and click “Next.”
- On the next screen, uncheck any checked boxes before clicking “Next.”
- The following screen asks if you would like to set up your email. You can skip this step if you plan to set up your email through the Suddenlink web portal or another email client such as Outlook or Mail. Click “Next” to continue forward.
- Click “Finish” to save your settings and to close out the wizard.
9b. Set your system preferences (Mac OS only)
- Click the Apple icon (upper left-hand corner) and navigate to “System Preferences.”
- Select the “Network” icon.
- When it opens, click on “Advanced.”
- A new pane opens. When it does, click on “TCP/IP.”
- Look at the “Configure” dropdown and choose “Using DHCP.” Click “OK.”
- You will return to the basic “Networks” pane. If “Apply” lights up, click it to save your settings.
- Close “System Preferences.”
Once you complete the steps above, you are ready to activate your account.
How to activate your Suddenlink account
With the LED light on the modem turned on and the computer powered up, you can now activate your Suddenlink account. The setup shouldn’t take more than thirty minutes.

- Open your web browser.
- This will automatically direct you to the Suddenlink welcome page, which will prompt you for your sixteen-digit account number.
- Enter your account number and click “Continue.”
- Confirm your other contact information. If correct, click “Yes.”
- Suddenlink will run a test on your cable lines to assess signal strength.
- Once it finishes, a “Terms of Service” page appears. Click “Agree” to continue.
- The next screen shows a transaction number. Save it for your records.
- Wait five minutes, then restart the computer, the modem, and the router. You may hear this process referred to as “powercycling.” Its purpose is to make sure the internet connection is steady and to clean up any rogue signals.
How to change your Suddenlink modem’s settings
Suddenlink makes it easy to update your modem’s settings. To change them, log in to the modem.
- Open a web browser.
- Type 192.168.0.1 in the address bar. Hit “Enter.”
- A login screen will appear. If accessing the modem for the first time, use your default login information.
- Username: cusadmin
- Password: password
- Click “Apply” to enter the modem’s interface.
- The home screen summarizes a number of settings. Look at them carefully to ensure they’re correct.
- Your SSID is “suddenlink.net-xxxx,” with the four x’s being the last four digits of the RF Cable Mac address (found on modem’s label).
- The channel should be set to “Auto.”
- The security mode should be WPA/WPA2-PSK.
- The encryption algorithm should show TKIP/AES.
- The pre-shared key generates automatically. You can also find the information below the SSID name on the modem’s label.
- Click on “Change Password.”
- Enter your old password.
- Enter your new password twice, once to set it and once to confirm it.
- Click “Set” to store your settings.
- Confirm any changed settings and close out the browser.
How to solve common self-installation issues
Before you call Suddenlink Communications about an issue, try some basic troubleshooting. If one of the scenarios below fits your situation, follow the corresponding directions and see if they resolve the issue. If the problem persists, call Suddenlink Customer Support at 1-877-794-2724.
Problem: The “online” LED light never turned on.
- A power cord could be loose.
- If the cord seems secure, try a different outlet.
- Check the coaxial cable—the connector can sometimes get bent.
- If the cable is bent, replace it with a new one.
- If none of those steps work, contact Suddenlink Customer Support.
Problem: The internet speed is really slow.
- Assess the number of wireless devices accessing the internet. They could be dragging down your speed. You can solve this problem by hardwiring certain devices, such as a DVR or TV.
- Run a speed test from a hardwired computer. The hardwiring is essential; Suddenlink bases its download and upload speeds on wired equipment.
- Check the age of your devices—it could be time for an upgrade. An older modem, computer, or laptop sometimes runs at slower speeds. Suddenlink recommends using a DOCSIS 3.0 modem for speeds of 20 Mbps or higher.
- Consider traffic congestion. Speeds will slow depending on the time of day or number of people in your home.
- If none of those options solve the problem, it could indicate a network problem or the need for more speed. Contact Customer Support to troubleshoot your account and to discuss options.
Problem: The internet connection seems choppy.
- Signal interference is likely to blame.
- Reboot the modem and computer. The reboot shuffles the devices through their settings and clears out the gunk signals.
- If the reboot doesn’t fulfill your expectations, check the cable and see if internet and TV share the cable connection.
- If they do, you should install the two-way cable splitter provided by Suddenlink. The cable splitter separates the frequencies in order to avoid mixed signals.
Self-installation vs. professional installation
While you can let the Suddenlink professionals install the modem and set up your internet service, it’s not too much work to do it yourself. However, deciding between the two options involves a few considerations.
Professional installation
Pros
- Expertise: Suddenlink’s technicians install and troubleshoot internet service, day in and day out. They know what they’re doing.
- Reliability: When the professionals set up your modem and home network, you know the work will be right the first time.
Cons
- Extra Fee: Suddenlink charges a fee close to $30 for its installation service.
- Time Commitment: Working with a technician takes a large chunk of time out of your day. Suddenlink somewhat eases the disadvantage of this with its “Where’s My Tech?” feature that you can use to track your technician’s status and arrival time.
Self-installation
Pros
- Free: The only things you expend with a self-installation are time and elbow grease.
- Convenience: You self-install the Suddenlink modem and activate your account whenever it fits your schedule.
Cons
- No Physical Support: If you elect to self-install, you’re on your own when internet connectivity issues arise.
- Uncertainty: If the thought of connecting several cables and cords causes the slightest sliver of anxiety to run down your spine, you may want to set up an appointment for professional installation.
It might be time for a new modem…here are our top picks
Suddenlink provides the ARRIS/Motorola model, which is a powerful modem. However, you shouldn’t feel obligated to use it. You can use a different modem as long as it meets Suddenlink’s compatibility requirements. The two modems below are not only compatible with the ISP, but also crowd-pleasers on Amazon.

The ARRIS pairs well with high-speed internet service, including 1 Gbps. Even if you start with a slower speed initially, you can ramp up to higher ones with this modem.
Notable Features: This modem delivers on its promise for speed. It can go up to 1.4 Gbps download and 262 Mbps upload. It also features thirty-two download and eight upload channels and four Ethernet ports.
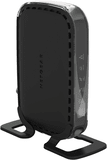
NETGEAR’s modem is an Amazon Best Seller, earning almost five stars from over 3,000 reviews. It won’t provide the same speeds and feeds as the ARRIS, but it complements Suddenlink’s mid-tier internet service packages.
Notable Features: This modem offers download speeds of 343 Mbps and upload speeds of 131 Mbps. It also claims eight downstream and four upstream channels.
How to contact Suddenlink Communications
Suddenlink Communications offers multiple avenues to get in touch with its support team. You can participate in an online chat, email, visit a local office, or call 1-877-794-2724 to speak with an agent. You also can use its online tool to track your technician’s status and estimated time of arrival.
Congratulations! You successfully set up your Cox High Speed Internet and it didn’t even require walking across glass or climbing down an elevator shaft. Go celebrate.
Hiring a professional to install your Time Warner Cable® Internet service can make the process fast and easy, but there are also plenty of advantages to setting it up on your own. Self-installation can be pretty simple if you’re comfortable with technology and know your way around a computer, and TWC offers a streamlined Easy Connect Kit that makes the process even faster.
If you’re trying to decide whether to hire a professional or install your Internet yourself, read through this guide to get a better idea of what to expect from each option.
Professional Installation
If your residence already has an accessible, working cable line, the process of a professional installation will be quick and straightforward.
1. Set up an appointment
You’ll need to contact TWC to make an appointment with a professional installation technician.
2. Allow the technician to set up your Internet equipment.
The technician will arrive in the predetermined time window, set up the modem and even offer to do a more involved activation. You will have to confirm the appointment when the technician calls, and you should also ensure that either you or another adult with valid photo ID can be present for the entire installation. Renters may also be asked to provide proof of landlord approval before the technician will run any new cables or wires.
Pros
- Simplicity: If you don’t want to deal with the hassle of figuring out a cable modem’s firmware or moving your furniture around to get to those wall outlets, a professional installation will simplify that process significantly.
- Troubleshooting Assistance: A professional will be able to solve any potential problems and will ensure that your Internet service is running effectively. You won’t have to worry about any technical issues or other problems. A technician can also help with more complex networking needs, including connection configuration and software installation.
Cons
- Installation Fee: TWC charges a one-time installation fee. Because this cost differs depending on your region and the equipment being installed, you’ll need to contact TWC directly for a specific quote for professional installation.
- Scheduling: A professional installation requires that you set a specific time for the installation. Because the appointment is usually scheduled in a certain window of time, it may be inconvenient to remain available for the duration of the projected time.
Self-Installation
If you’re considering doing a self-installation, the process will be more involved than with a professional installation.
1. Order your Easy Connect Kit
When ordering online, eligible plans automatically opt in for an Easy Connect Kit. You should make sure that the option is selected before confirming your order.
2. Receive your equipment package
You can pick up your Easy Connect Kit at a local TWC store or opt to have it shipped to you by mail. If you choose the mail option, the package should arrive 2–5 business days after the order is placed.
3. Set up your equipment
Every kit should contain your cable modem, connection cables, an Easy Connect Guide, and some additional accessories. Follow these steps to ensure a smooth installation:
- Locate your cable wall outlet, and run your coaxial cable from the outlet to your modem’s “In” socket. If you have a cable set top box, use the included cable splitter to run a separate cable to both your modem and your set top box.
- Connect your computer to your cable modem with an Ethernet cable. Most desktops should have an Ethernet port on the back of the case, and many laptops will have an Ethernet port on the side of the body. If you’re using a wireless modem and have subscribed to TWC Home WiFi, you won’t need to connect anything with an Ethernet cable.
- Plug your modem’s power cord into the back side of the modem and connect it to a wall outlet.
- Make sure that the light on your modem has turned on before proceeding. You will need to activate your modem before you can connect to the internet.
4. Activate your equipment
There are two ways to activate your TWC Internet service.
- Online: In order to activate your modem online, you’ll need to log in to TWC’s Easy Connect website and select “Manage and Troubleshoot Services.” Navigate to the “Troubleshooting” tab and select “Internet.” Under the “Activate/Connect Modem” option, click “Reset My Modem.” Your cable modem should now be activated.
- By Phone: Call TWC’s automated phone line at 1-877-309-5869 in order to activate your modem by phone. After verifying your account with your phone number, say “Activate my Modem” when prompted. Follow the instructions given and the phone system will walk you through the activation process.
After activation, your Internet service should be up and running. You can now connect to the Internet and configure your WiFi network.
5. Configure your home wireless network
Configuring your TCW WiFi™ will ensure that each of your devices can connect to the Internet.
- Open your Web browser and connect to 192.168.0.1 from your address bar. This will navigate to your modem’s firmware.
- Log in with the default username and password. While these can differ between manufacturers, the default username and password are usually “admin” and “password,” respectively. The username and password may also be written on the bottom of some modems. Contact your modem’s manufacturer if you have difficulty finding the correct default login information.
- Click the “Wireless” tab to configure your WiFi settings. You can rename your WiFi by changing the value in the Network Name (SSID) field. You should also change your password, which is located in the WPA Pre-Shared Key field.
- Try to connect to your WiFi with any of your wireless devices to make sure the connection is up and running.
If you run into any problems at any point during the setup, consult the troubleshooting section of the included instruction guide or contact TWC directly.
Pros
- Speed: Self-installing means you can skip the hassle of setting up an appointment with TWC. You can get online as soon as you finish installing your cable modem, and you can do it on your own time and according to your own schedule.
- Cost: By self-installing, you can avoid the one-time installation fee and save yourself a few dollars. While it does cost some of your own time to install the service, the time investment is negligible.
- Setup Flexibility: You can install your cable modem wherever you feel is best. You’ll also be able to take your time configuring things in your home to make sure you get a strong signal in every room.
Cons
- Limited Guidance: If you run into any networking problems beyond those covered in the installation guide, it can be difficult or impossible to fix the issues without the help of a professional.
- Kit Accessibility: The TWC Easy Connect Kit can be picked up from any TWC Store location that has kits in stock, but availability may be limited depending on demand. If you don’t have a store close by, the kit will be shipped to your address. It can take up to five business days for your cable modem to arrive, which may be longer than you want to wait.
The Verdict
Self-installation isn’t for everyone — if you are a technophobe or dislike dealing with the ins and outs of cable modems, you’ll be better off footing the installation fee to hire a professional. If, on the other hand, you have some basic experience with technology and an inclination towards DIY projects, opting for the self-installation option will save you both time and money.
If you’re ready to go forward with self-installation, order a Time Warner Cable plan and pick up your Easy Connect Kit today.